Essential materials and tools for padel racket repair
The creator from Padel Chiquito begins by detailing the essential materials needed for a professional-quality padel racket repair at home. The process requires a careful selection of tools and products to ensure durability and a clean finish. The recommended items include:
- Dremel tool or sandpaper – for precise sanding of the damaged area
- Epoxy resin base and hardener – to bond and reinforce the structure
- Scissors – for cutting the carbon fiber fabric
- Mixing container – for preparing the resin mixture
- Acetone – to clean impurities and improve adhesion
- Plastic wrap (film) – to eliminate air bubbles and ensure a smooth finish
Each tool and material serves a specific function, and skipping any step can compromise the repair’s effectiveness. The creator emphasizes that using the right type of carbon fiber, specifically 3K carbon pre-treated for cutting, will make the process much easier and yield a better result.
Step-by-step process for repairing a cracked padel racket
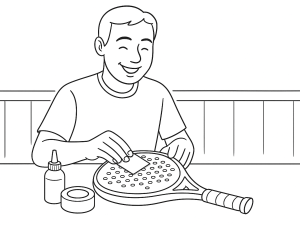
The repair begins with careful sanding of the damaged area. The reviewer highlights the importance of sanding only until reaching the affected layer, avoiding unnecessary removal of undamaged material. This step is crucial for ensuring that the resin will bond properly and restore the racket’s structural integrity.
After sanding, the area must be thoroughly cleaned with acetone to remove dust and impurities. This cleaning step is vital for maximizing the effectiveness of the resin and carbon fiber application.
Next, the creator cuts a piece of 3K carbon fiber to match the size of the sanded area. The video demonstrates the challenges of working with untreated carbon, which tends to fray and complicate the process. The recommendation is clear: invest in pre-treated carbon to avoid frustration and achieve a neater repair.
Mixing and applying epoxy resin for a strong bond
With the carbon fiber prepared, attention turns to the epoxy resin. The creator stresses the importance of following the manufacturer’s mixing ratios. In this case, the recommended proportion is three parts resin base to one part hardener. Mixing accuracy is essential for a proper chemical reaction and a durable repair.
The reviewer notes that the chosen epoxy is a fast-curing type, so it must be applied quickly after mixing. The ideal working temperature is between 20°C and 25°C to ensure optimal curing and handling.
Application involves layering the carbon fiber and resin over the damaged area. Multiple layers can be applied, allowing each to dry before adding the next, to reinforce the repair as needed.
Finishing touches for a professional result
Once the resin and carbon fiber have been applied and allowed to cure, the creator recommends cleaning up any excess resin from the edges. This step helps achieve a smoother, more professional look.
The final step is to wrap the repaired area with plastic film. This technique removes air bubbles trapped between the layers and compresses the repair for a more compact and visually appealing finish. The result, while not always cosmetically perfect, is described as highly effective in restoring the racket’s strength.
Key tips and common mistakes to avoid during repair
Throughout the demonstration, the reviewer shares several practical tips to improve the repair process and avoid common pitfalls:
- Use pre-treated 3K carbon fiber to prevent fraying and simplify application
- Sand only the damaged area, preserving as much of the original structure as possible
- Clean thoroughly with acetone before applying resin
- Follow the exact resin-to-hardener ratio for optimal curing
- Apply resin and carbon fiber quickly if using a fast-curing epoxy
- Wrap with plastic film to eliminate bubbles and improve the finish
These insights are based on the creator’s own trial and error, providing valuable guidance for anyone attempting a similar repair.
When it makes sense to repair your padel racket
The creator also addresses the question of whether it’s worth repairing a broken padel racket. The answer depends on the extent of the damage and the value of the racket. For minor cracks or separations, a careful repair can restore much of the original performance and extend the racket’s life. However, for severe structural failures or very old rackets, replacement may be a better investment.
The channel emphasizes that, when done correctly, this repair method creates a chemical bond rather than a simple adhesive fix. The result is a strong, compact joint that can withstand regular play, though the appearance may not be flawless.
Summary of the repair process and practical outcomes
Padel Chiquito’s step-by-step guide offers a practical and effective way to repair a cracked or broken padel racket at home. The key takeaways from the video include:
- Gathering the right materials and tools is essential for success
- Careful preparation and cleaning of the damaged area ensures a strong bond
- Using pre-treated carbon fiber and following resin mixing instructions prevents common mistakes
- Finishing with plastic film improves both strength and appearance
- This method can significantly extend the life of a damaged racket if the repair is done with attention to detail
While the process requires patience and precision, the creator demonstrates that a professional-quality repair is achievable for most players willing to invest the effort.